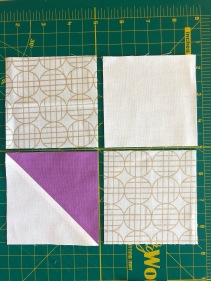
Yay, we are back for week 4 friends! I’m so glad you’re here. Hopefully last week you had a chance to finish up all your diamond in a square block units. Now it’s time to move on to our HSTs and construct the four patch block units! This is a big week so I’ll be hunkering down as much as possible and sewing every minute I get! Don’t stress however if you start to feel behind…… we have a catch up week after next week, so week #6, in order to let everyone get on the same page!
Okay, so let’s get started! The HST block unit is one of the easiest and most satisfying to sew, for me it’s the trimming that is my quilting nemesis! LoL! Using your pattern directions, or your own preferred method, you’ll construct the HSTs, press them open (or as you like), and trim them all up. This is a pretty big step, however chain piecing does help expedite this task. Now if someone could just invent a magic trimming machine!


This is how I trim my HSTs, if you have a method you prefer, by all means, do that! After I press them open and they are nice and crisp, I use my square ruler, one that is the size you need or larger will work. Line it up using the diagonal guideline and the measurement markers on the ruler. Cut the two sides of excess. Then turn your square and repeat, making sure to line up the diagonal each time. Note: there will not be as much to trim, mostly just dog ears on the opposite side.
After you get all your HSTs sewn and trimmed, you’re ready to construct your four patch block unit. You’ll start by sewing together the pairs.
This process is also sped up greatly by using an assembly line/chain piecing method. Refer to the pattern for more details. Obviously, if you are choosing a more intricate layout, you’ll want to pay attention to color placement considerations. Generally speaking though, the HST patch (colored side in) goes diagonal to the background square and the two squares (that will end up forming the square of the secondary shape) will go diagonal to each other. This sounds confusing perhaps, but as you work with your four patch units, it will quickly make sense.
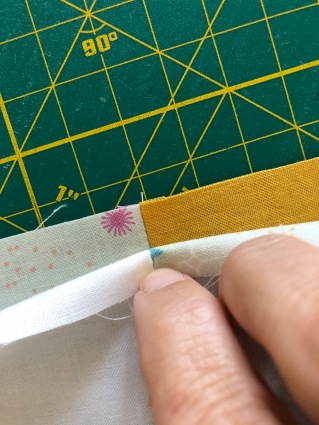
The most important step will be matching your seams as you sew your pairs together. I find this much easier with the seams pressed flat, and recommend pinning at the seam where it matches, however if you’re more of a seam nester, then that works too! Press all seams flat. Again, please refer to your pattern for further, more step by step instructions.
So that’s it! Let me know if you have any questions. This is a big week of sewing. Good luck!

Our prize this week for one lucky winner who posts their process shots, is a generously donated half yard bundle of Ruby Star Liana from Bloomerie Fabric and a pack of sewing machine needles from yours truly. I’ll announce a winner on Saturday!


