gold and white patchwork zippered pillow cover- Blooming Poppies

Zippered Throw Pillow Cover ~ Blooming Poppies

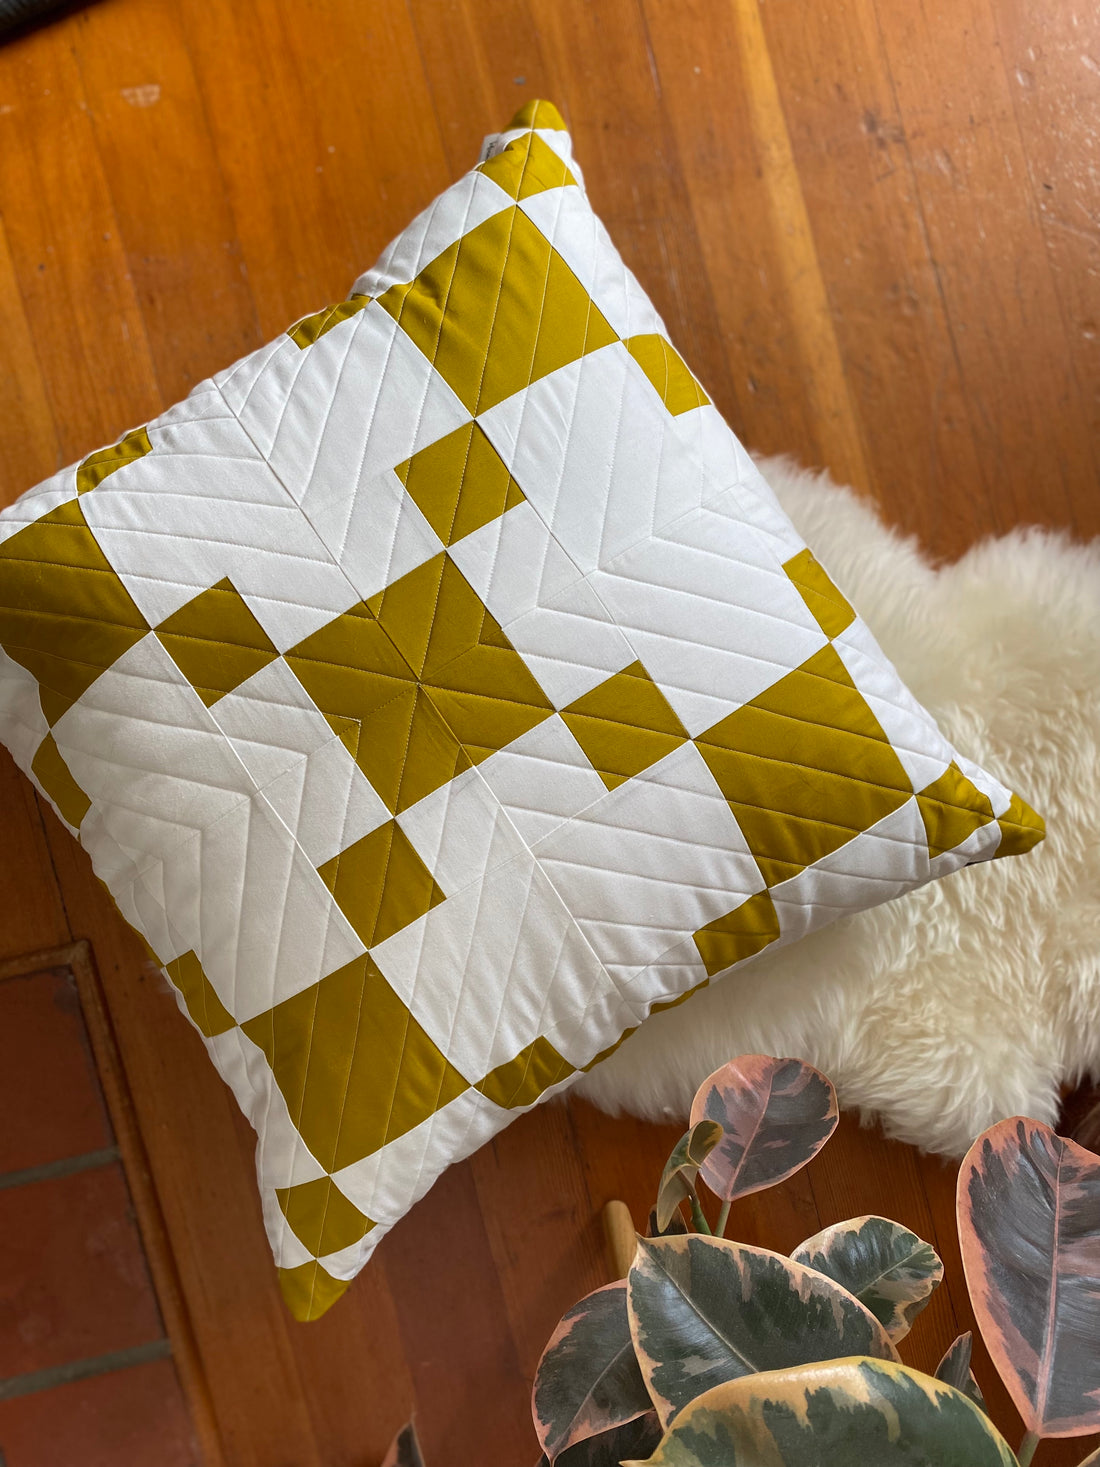
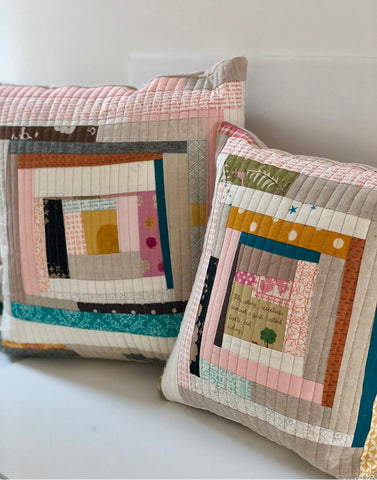
This tutorial is meant to pair with the BONUS LAYOUT for the Road Trip Quilt Pattern (as shown in tutorial).  You can however use any quilt top front that measures to 24ish".  Additionally, you can use the techniques here and adjust the sizes as needed.             Zippered Pillow Cover Tutorial graphic                                           

Throw pillows come in all shapes and sizes and can really help make a space feel cozy and inviting.  In this tutorial I will give you instructions for how to make a  24" pillow cover with a sturdy zippered closure.  What I love about a zippered closure is that it is secure and clean.  When it's time to launder the pillow cover, I can easily unzip and remove the cover.  Just pop the pillow back in when the cover is all clean and dry!    
  Bright wood Quilt pillow   scrappy log cabin pillows by blooming poppies     gold and white pillow    Road Trip Quilt- Blooming Poppies
It's my go to way to finish all my pillows and makes for a smooth, secure and polished finished every time. 
 
                    zipper on pillow

 Materials Needed

(1) 24.5" (or so) quilt top - I suggest the  Road Trip Quilt Pattern
 
(1) 25" piece of backing fabric- for back of pillow (24.5" if not planning to quilt it)

(2) 26" pieces of batting (only 1 if you don't plan to quilt the back, I do highly recommend quilting it however)

(2) 26" pieces of muslin for the quilt sandwiches (only 1 if you don't plan to quilt the back)

(1) 22" zipper (I use cotton with metal zipper). If you use nylon then at least 24", but longer will work since you can cut it to size.

(1) 5" x 5" coordinating piece of fabric- for zipper tabs

A piece of fusible hem tape about 8 to 10" long
_________________________________________________________________________ 
                                 
    _________________________________________________________________________

    Let's Get Started

                                  pin basted pillow front with green and peach 
    Create a quilt sandwich by placing your muslin (or whatever you're using) backing fabric down wrong side up, then your batting piece, lastly your pillow quilt top, right side up.  I like to to pin baste but any method you like will work just fine. 
                Pillow top under sewing machine.  Quilting lines visible
                               quilted pillow top
    Quilt your piece as desired. 
     
    Repeat with the back pillow piece if you plan to quilt it.  I personally like both front and back to be quilted.  I feel it makes for a more hearty and finished look. 
              quilted pillow cover     
    Square up and trim away batting on front piece.  You should have a roughly 24" quilted piece (please excuse the horribly lit photo). If your piece is a little larger by a 1/2" or so that is okay.  
     
    The pillow back piece should be trimmed to 24.5 on the two sides perpendicular to where the zipper will be placed. Your back piece will be about 24.5" x 25ish"  
    Set aside. 
     

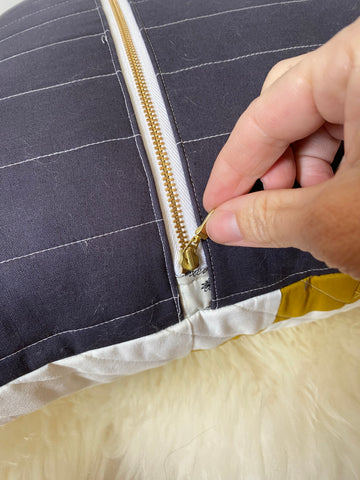
    Prepare the zipper (if using a nylon zipper, trim it to 24" and skip the fabric tab steps). 

                              
    Fold the 5" x 5" piece of fabric in half, matching wrong sides together.  Press in place. 
                                       
    Then fold and press both ends toward the center fold.  You'll have a 5" piece of fabric tape.  
     
                                      
    Cut it in half creating (two) 2.5" pieces. 
                          
    Cut 4 pieces of fusible hem tape about 2" long.                                   
     
                                
    Layer a piece of hem tape, then zipper, then a second piece of hem tape on top.  Finally, fold over the fabric tab.  
                                     
    Press in place so your zipper is partially secure. 
     
                               
    Topstitch in place as shown. Trim excess fabric from both sides of tab.   Repeat for other end of zipper.
    Set aside.
     

    Sew Zipper in Place

                           pillow back cut into two pieces

    From the 24.5" back piece, cut about 1/3 from the top.  You'll now have two pieces for the back. One that is about 9" x 24.5" and another that is about 16" x 24.5".   
     
     
                          zipper face down and pinned 

    Unzip zipper about halfway and lay, face-down, right sides together,  along one long side of the 9” (smaller piece) wide pillow back panel, being sure to center it on the panel, leaving roughly 1/2" on either side of zipper.  Pin or clip in place.

                           zipper foot

    Using your zipper foot, sew zipper in place (backstitch at the beginning), removing clips as you go and stopping an inch or so from where zipper is closed.  With the needle down, lift presser foot and close the zipper. 

                            backstitch

    Finish sewing zipper to the panel. Backstitch at the end.

                              zig zag stitch

    Finish the raw edge by zigzag stitching the entire length of zipper through all layers.

       topstitching zipper     Press quilted panel down, away from zipper (I forgot to get a photo of this step) and topstitch along the edge of the panel right next to the zipper.


    Next, place the zipper piece right side down on the top of the other half of the back piece. 


    Pin in place. 


    Repeat the process you used for the first side of the zipper, in order to attach the zipper to the other side of your pillow back.


    Once both sides have been topstitched (as shown above, but hard to see), 


    lay the front piece on top of the back as a guide to trim away any excess batting or fabric from the back piece top and bottom. If the sides need a little trimming too, now is the time.  They should be the same size and match on all four sides. 


    Unzip the zipper about 2/3 of the way and place right sides together (this step is critical- I promise).  Pin or clip all layers together.  Stitch around all sides, using 1/2" seam allowance and backstitching at each corner. 


    Instead of pivoting at each corner, sew each side from edge to edge.  Trim about 1/8" away from the point where the side seams meet. 

    Optional step:  Sew a zig zag stitch all the way around the perimeter of the pillow.  I often forget this step but it's a good one.  

                              Road Trip Quilt Pillow

    You have finished your pillow!  Yay!  Now you get to turn it right side out, push out those corners and stuff that fluffy, oversized insert in there.

                            Road Trip Quilt pillow with Zipper closure - Blooming Poppies

    Nice job!  Give yourself a pat on the back!!  

    I'd love to see your new gorgeous pillow.  Why not share it with me and all the other quilted pillow lovers, under the hashtag #bpoppiespillowtutorial 
    Blooming Poppies Pillow Tutorial
     
    Back to blog

    Leave a comment

    Please note, comments need to be approved before they are published.