Hello my friends and welcome to WEEK 8 of our QAL. I know many have already finished up but for those of us still at it this week will be dedicated to FINISHING! We'll be basting, quilting and/or binding! I think most people are already in some phase of this process, which is good because it's a big one and an awful lot to fit into one week! Yikes, this could have easily been a two part post!
If you're still feeling a bit behind, not to worry, our final WEEK 9 will be just for sharing your beautiful finished quilt. So I guess you could use that week to finish up if needed. My hope is that you just keep going! You're almost to the finish line, the light at the end of the tunnel is clearly visible. We've got this!!
Finishing Your Quilt -
These are the things you'll need to consider, preferably ahead of time so when it comes time to finish, you can get right to it.
- Quilt backing - will you be piecing it with scraps or using yardage? If sending to a longarm quilter, have you accounted for enough overage on the backing?
- Batting- will you be using cotton, wool, polyester or a blend? Do you need to purchase or will you be piecing that together?
- Basting (if quilting it yourself) - will you be pin basting, thread basting, or spray basting? Do you have all the supplies to make this happen?
- Quilting- will you be sending it off to a longarmer, quilting on your home machine or even maybe hand quilting? What design will you choose? Do you have adequate amounts of thread in the right color?
- Binding- will it be scrappy or do you need to purchase yardage?
As you can see, a fair amount of forethought goes into quilting your quilt. This planning should take place fairly early on unless you just generally have a well stocked sewing room.
 I am choosing to finish both of my Harken QAL quilts differently. My Scrappy Version is off at the long arm shop.
  All I have to do is trim it and attach binding. I made a fun little scrappy binding using the leftovers from my fat 8ths. You can check out the process here.
  My Classic Version will be quilted on my home machine and require a lot more attention to detail. That is the one I will be referring to for this post.
Backing-
If you're sending your quilt to a long arm quilter, I would check with them to see how much overage they prefer when accepting your quilt. If you'll be quilting it on your home machine a general rule is to add 4" onto each side. So a quilt top that measures 67" x 67" will require a backing fabric of approximately 75" on all 4 sides.
The most straightforward method is to sew two 2 1/8 yard pieces together along the selvedge edge and then cut off the extra 8 or 9" to save for a future project. I recommend cutting the selvedge edges off prior to cutting and using a 1/2" seam allowance when sewing your yardage together.
Sometimes, it is necessary to piece the back to together to avoid purchasing more yardage. My only tip with this method would be to try to keep the grain running in the same direction throughout the back whenever possible. Helpful for getting your quilt to lay nice a straight but certainly not an absolute must.
Batting-
I use have tried a variety and frankly, don't have a super strong opinion. Personally, I prefer natural fiber battings so I generally go with a bamboo or cotton batting. Bamboo is great due to the fact that it is a sustainable fiber. It has a nice drape and is easy to work with. And cotton is, well, it's cotton, what's not to love? I LOVE using pre washed wool for certain heirloom quilts that I know I'll be handquilting. The stitches glide through wool like butter. Batting is really a personal choice and depends on the quilt and what it will be used for.
Basting-
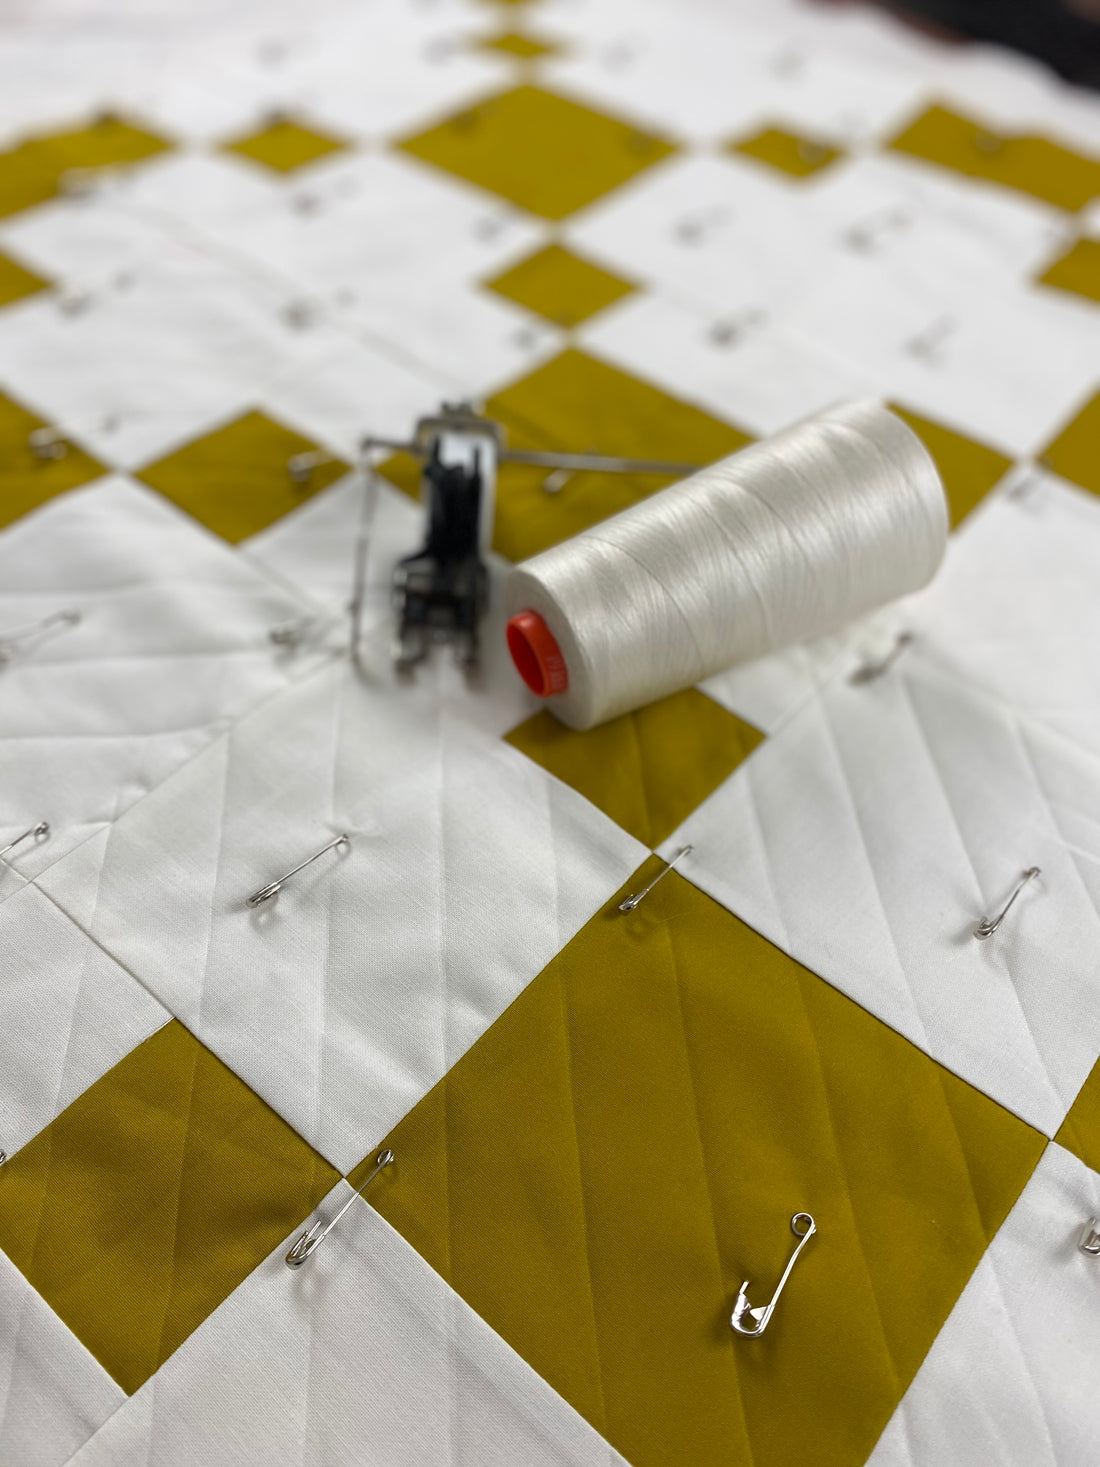
 I'm a pin basting gal. Always have been (sample shown scrappy granny square quilt circa 2011). I recommend taking the time to do this part with care. Don't skimp on basting pins and make sure your backing is taped down well and taut but not stretched!
  I have tried spray basting in the past and found it to be much harder, but it's definitely a personal choice. I see how there are pros and cons to both but I'll stick to pin basting for now (sample shown is the Guard Rails Quilt).
Quilting-
The possibilities are sort of endless in terms of quilting design. It really depends on your skill level, your time, and your personal aesthetic. I personally prefer straight lines. I think mostly that is because I'm not as skilled or comfortable with free motion quilting. Honestly I just have no free motion skills period, and it scares me to even try. If you are in the same situation, but would like to add flowy and loose lines to your quilt, you could make up "sampler sandwiches" to practice your technique. Just keep in mind that a quilt of this size can get pretty unruly under a home machine. I would classify free motion on this size quilt, expert territory. But that might just be me!
 So what about straight line quilting? It's clean, modern and a beautiful way to finish off any quilt. Parallel lines are always an easy choice, whether they are vertical, horizontal or diagonal. They look good and are easy to achieve. The question you'll want to ask yourself is how far apart will your lines be.
 I love a 1.5" spacing. Any closer and your quilt could end up not being as drapey. In my opinion if you make them too far apart (4" or more), they loose their effect and it looks unfinished. Another option is to quilt both vertical and horizontal lines to create little squares. This is winning combo that always seems to work. Again it's your call as to how large or small you want the squares to be.
 Lastly, you could also quilt diagonal lines and make your quilted squares on point (sample shown is Road Trip Quilt pillow).
 This is a personal favorite of mine (sample show is the Brightwood Quilt).
 True, it takes a bit of extra time to do that second set of parallel lines,
 but it's so worth it in the end. I am always glad I chose to take the time to do it (sample shown is Road Trip Redux).
 For an earlier scrappy version of my Harken Quilt, I chose to do very loose diagonal quilting lines. These lines were strategically placed to run through the centers of certain squares and marked with my Hera Marker.
 Because they were so far apart, I decided to secure them with some charming little yarn ties. I LOVE how flowy and cuddly this quilt is. This one also has a wool batting by the way, which gives it an extra bit of "poof" and cozy factor.
 There are just so many possible options for quilting lines. My best advice is to think it out first, measure where your lines will land with the chosen design.
 My favorite way to mark my lines is with a long quilting ruler and a Hera Marker.
 I do this after it's basted which means navigating around the pins. You get used to it. It really does make quilting much easier.
 Another thing that can help guide you and make your quilting lines more accurate is a guide on your walking foot. Don't be afraid to use any and all methods to get your lines to come out the way you want. You've put a lot of work and time into piecing your quilt and it's important that your quilting lines are clean and accurate to your liking. And a side note, I have ripped out entire huge sections of quilting before and re done them. It happens and you're not alone.
Binding-
 It's the icing on the cake, the cherry on the sundae, the final step that makes it all feel complete and extra pretty!
 Quilt binding is pretty straight forward. Just cut the required amount (shown in pattern) and create your continuous binding. Whether it's scrappy or not, you want to make sure you have enough to go all the way around the quilt and then some. You'll need extra in order to finish it off.
 If you're creating a scrappy binding, the pattern directions won't work and you'll need to calculate the inches of fabric needed for your binding. In the case of this lap size that is 67" x 67" you'll need 280". As for any quilt, the formula for determining how many inches of quilting binding you'll need is as follows:
Find the perimeter of the quilt - Length x 2 and Width x 2. Add those together and then add an additional 12" for ease.
In the case of this lap size, all sides are 67" so 67 x 4 = 268 + 12 = 280"

 After you've attached the binding, you'll need to decide if you want to machine stitch or hand stitch to finish it off.
 And if you'll be hand stitching it, will you do a big stitch binding or a traditional invisible stitch? Again, this is a purely personal choice, there is no right or wrong in my book and I have done both, many times.
 It really depends on my time, my energy, my resources and the quilt itself.
 That about wraps it up my friends. I know this post was crazy long so kudos if you got to the end!!
 I can't wait to see all of your beautiful finished quilts.
 Next week is our OFFICIAL sharing week. This week would be a great week to share your process of any of the above steps.
 Our generous sponsor this week is Ponderosa Creative. Many thanks to Paige for offering up a fun gift bag of goodies along with one of her PDF patterns.


Happy finishing my friends...